iOS 建立遠距推播 App (一) Swift 程式篇
Step 01 : 建立 Storyboard 專案
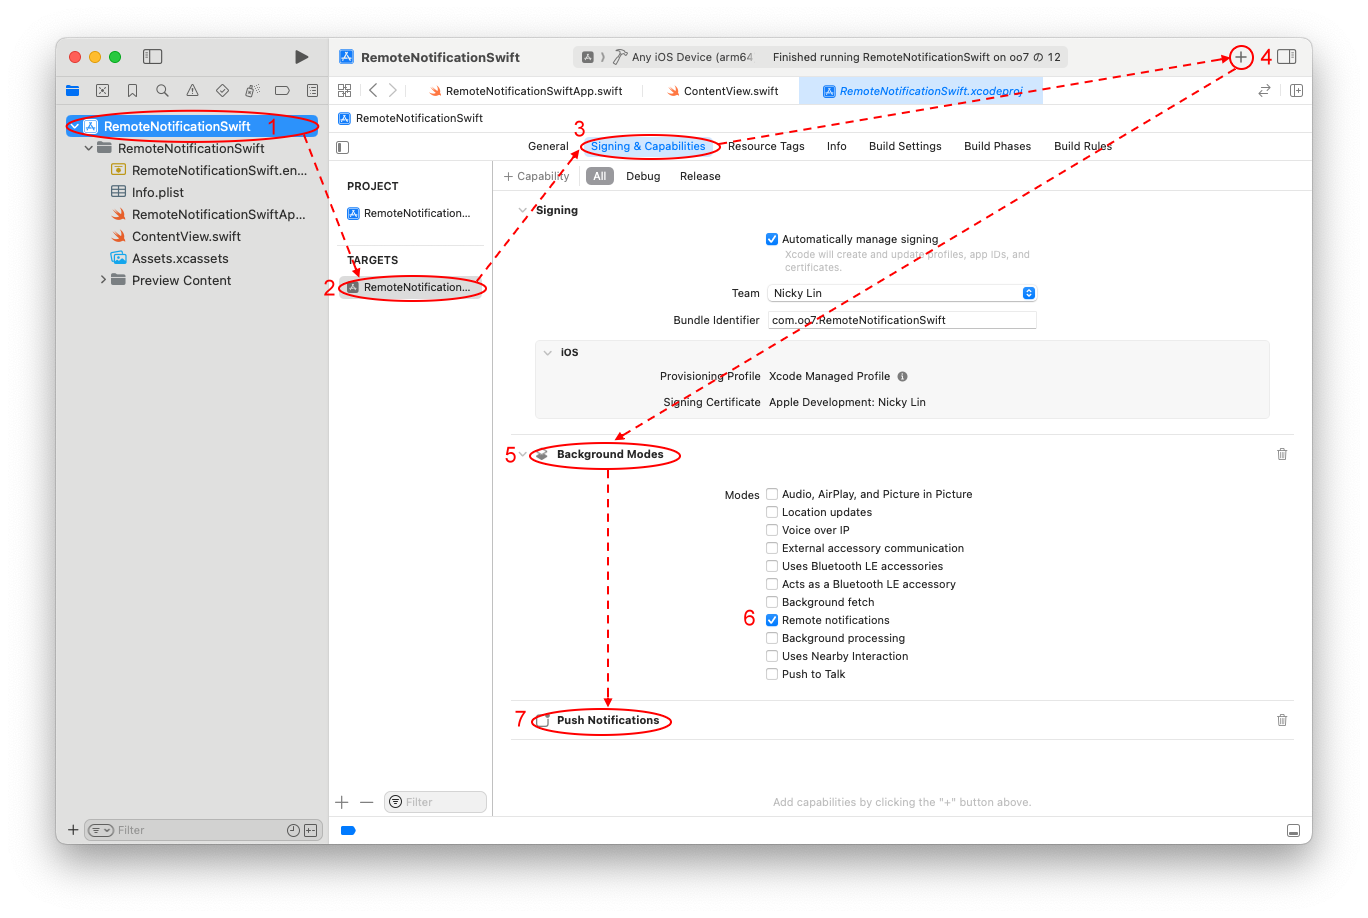
Step 02 : 設定各項參數
(1) 在 專案(Project) TARGETS 頁 Signing & Capabilities 內新增
Background Modes 及 Push Notification 二個 Capabilities
Background Modes 項目勾選 Remote notifications
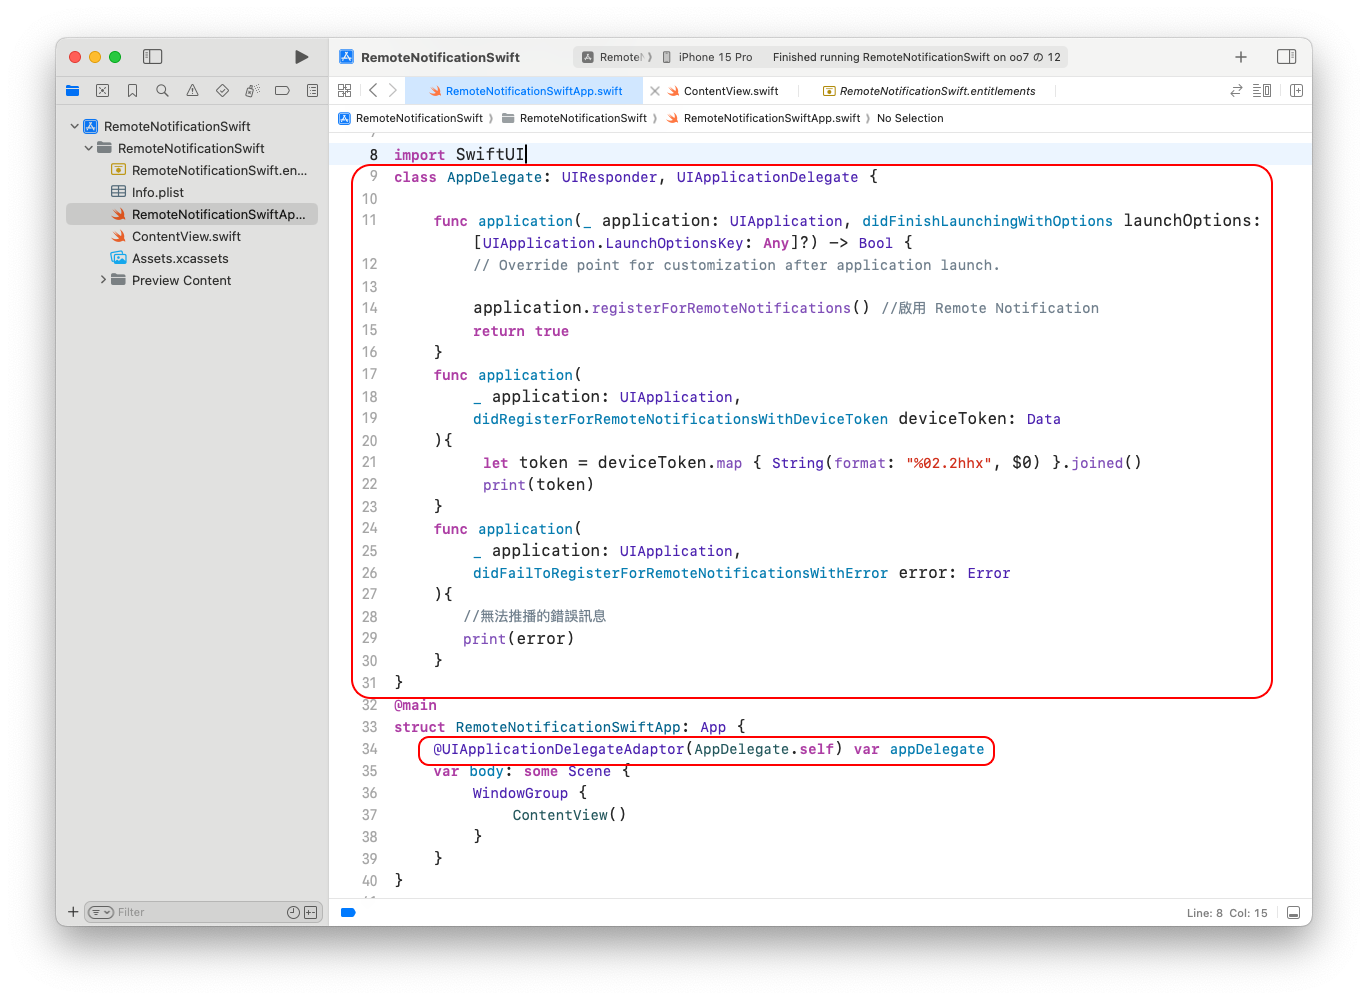
Step 03 : 自訂 AppDelegate 類別
在 專案名+app.swift 檔的 @main 前加入
class AppDelegate: UIResponder, UIApplicationDelegate {

    func application(_ application: UIApplication, didFinishLaunchingWithOptions launchOptions: [UIApplication.LaunchOptionsKey: Any]?) -> Bool {
        // Override point for customization after application launch.

        application.registerForRemoteNotifications() //啟用 Remote Notification
        return true
    }
    func application(
        _ application: UIApplication,
        didRegisterForRemoteNotificationsWithDeviceToken deviceToken: Data
    ){
         let token = deviceToken.map { String(format: "%02.2hhx", $0) }.joined()
         print(token)
    }
    func application(
        _ application: UIApplication,
        didFailToRegisterForRemoteNotificationsWithError error: Error
    ){
       //無法推播的錯誤訊息
       print(error)
    }
}
在 專案名+app.swift 檔的 struct 專案名+App: App{ 內加入
@UIApplicationDelegateAdaptor(AppDelegate.self) var appDelegate
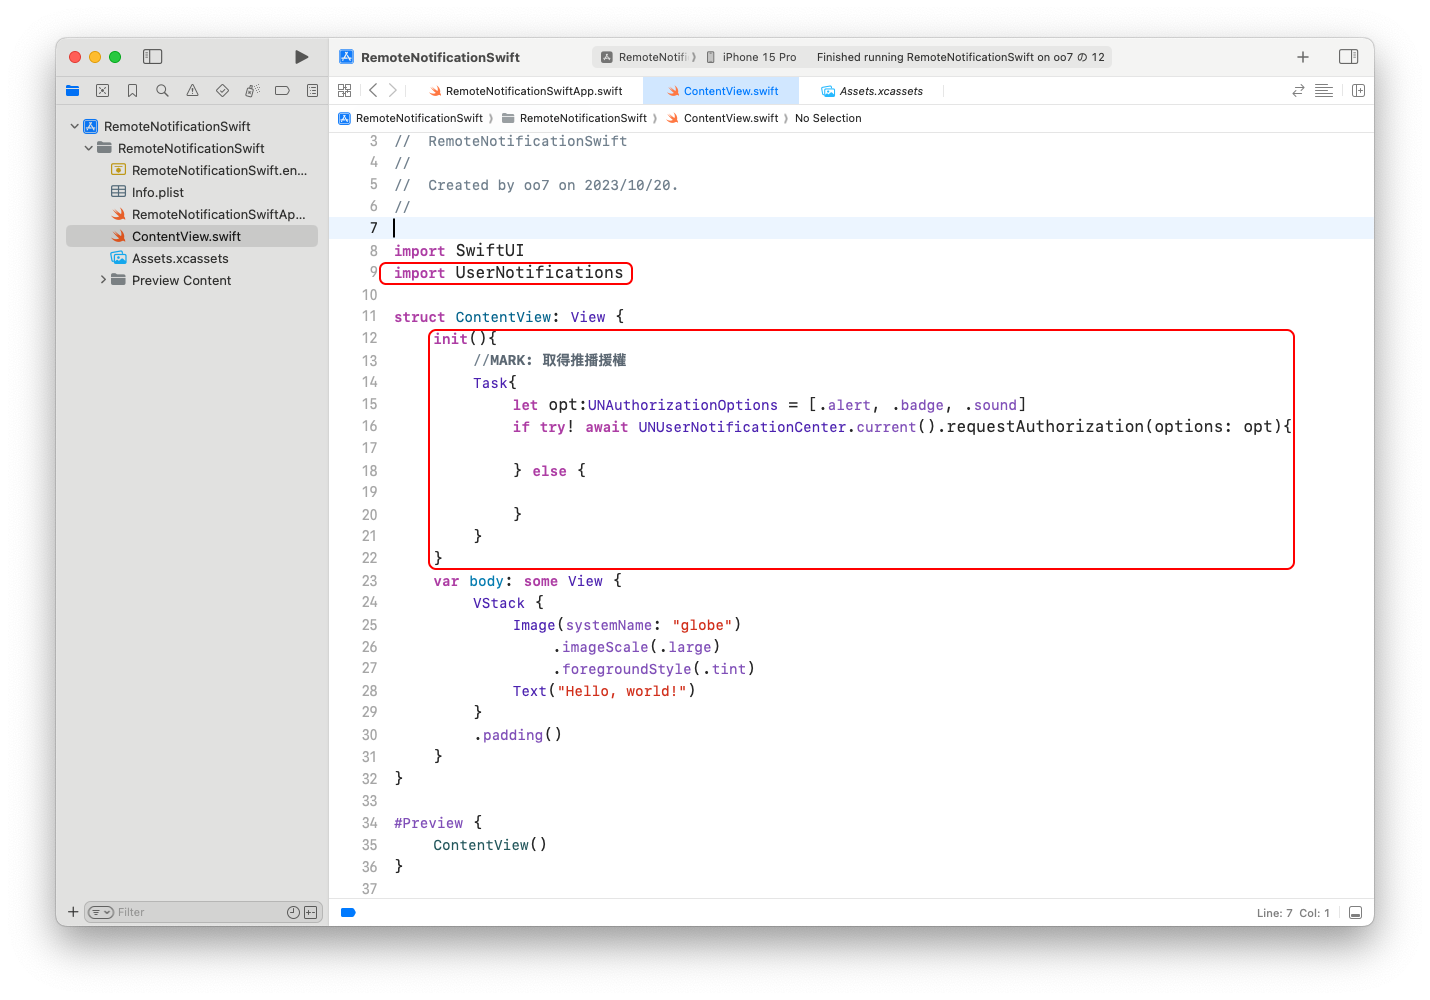
Step04 : 在 ContentView.swift import UserNotifications 並在啟始 view 加入下列代碼
init(){
    //MARK: 取得推播援權
    Task{
        let opt:UNAuthorizationOptions = [.alert, .badge, .sound]
        if try! await UNUserNotificationCenter.current().requestAuthorization(options: opt){

        } else {

        }
    }
}